How to Set Up SSH Key-Based Login from Ubuntu to Synology NAS (DSM 7.1)
-
 Jason Yang
 - 05 Jan, 2026
- Views —
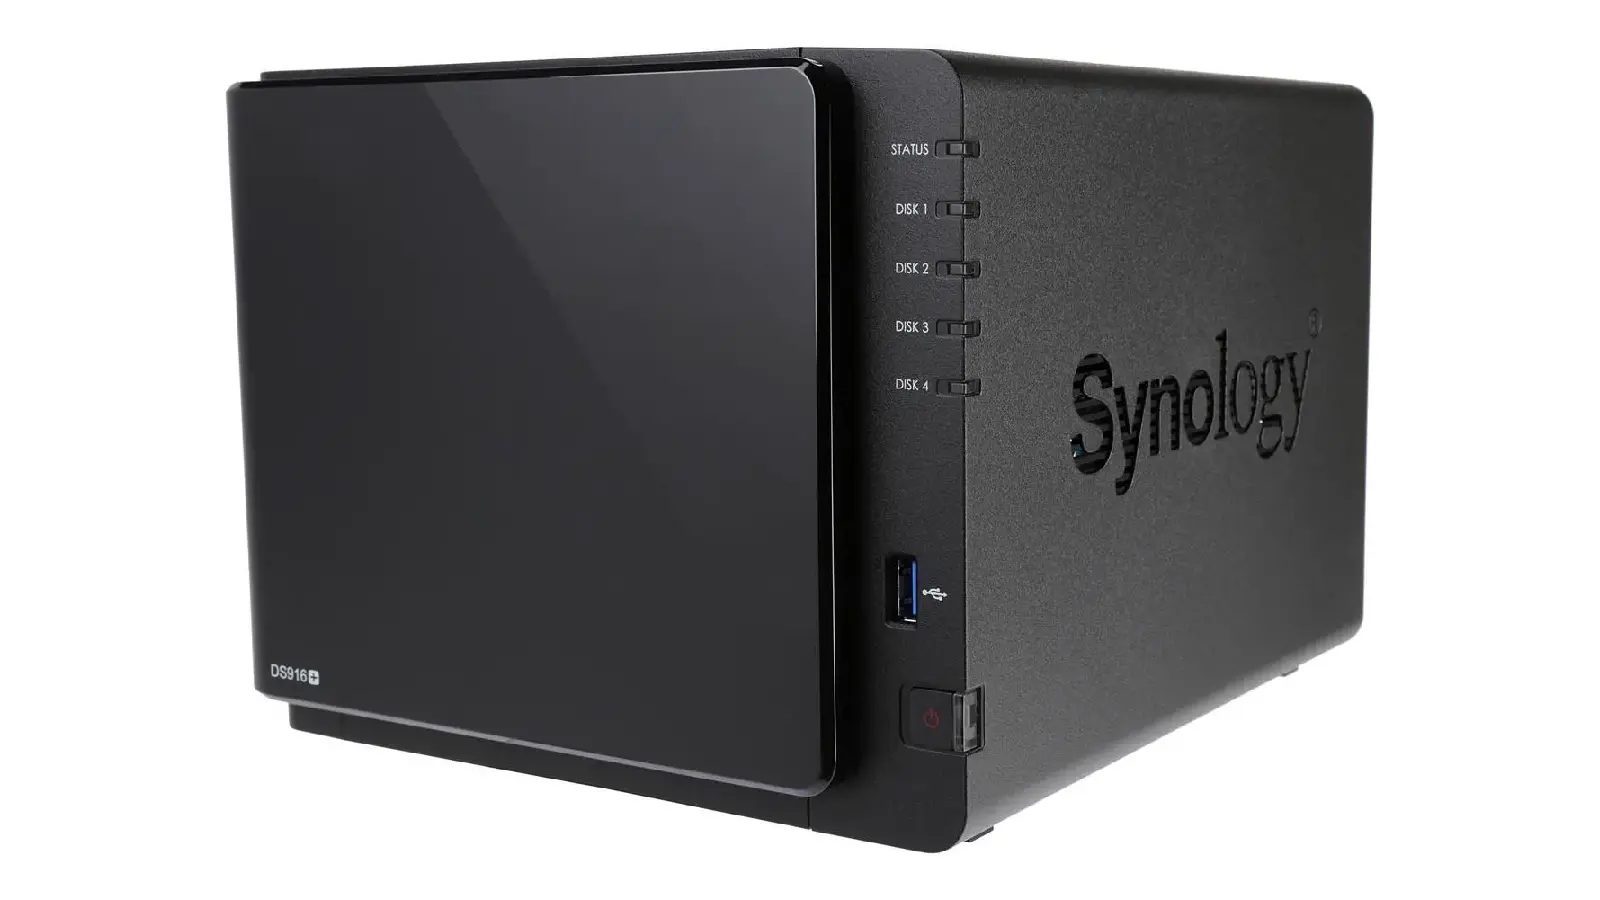
This step-by-step guide explains how to generate an SSH key on Ubuntu and configure key-based authentication on Synology NAS running DSM 7.1.
With SSH key-based login, you can securely access your NAS without entering a password every time, which is especially useful for automation, scripting, and managing servers from multiple devices.
While some SSH clients can store passwords locally, SSH key authentication is more secure, reliable, and widely recommended.
Step 1: Enable User Home Service on DSM 7.1
On your Synology NAS:
- Go to Control Panel → User & Group → Advanced
- Enable User Home Service
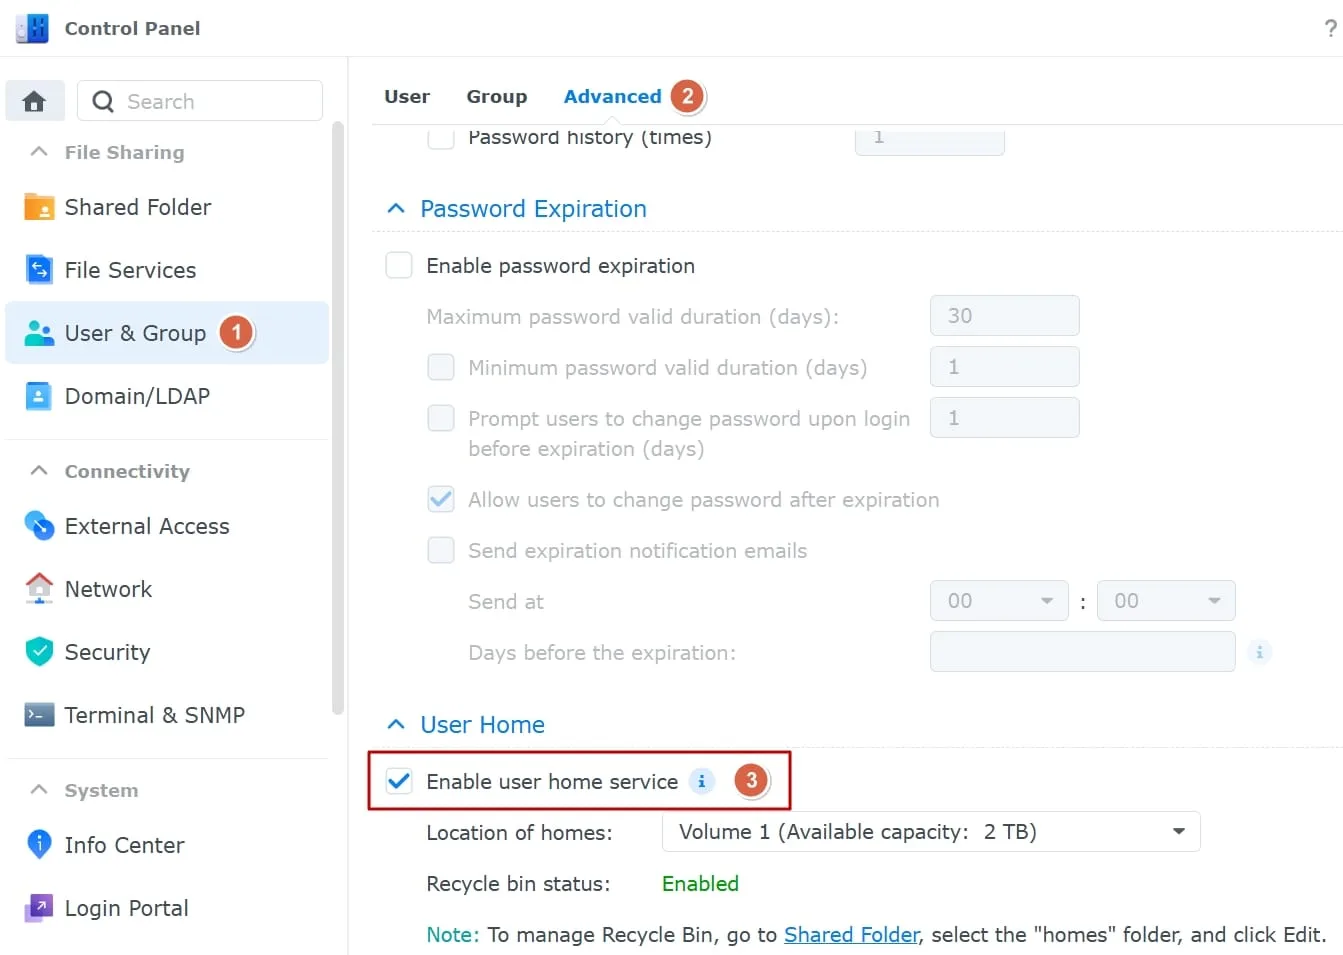
This creates a home directory for each user, which is required for SSH key authentication.
Step 2: Enable SSH Service on DSM 7.1
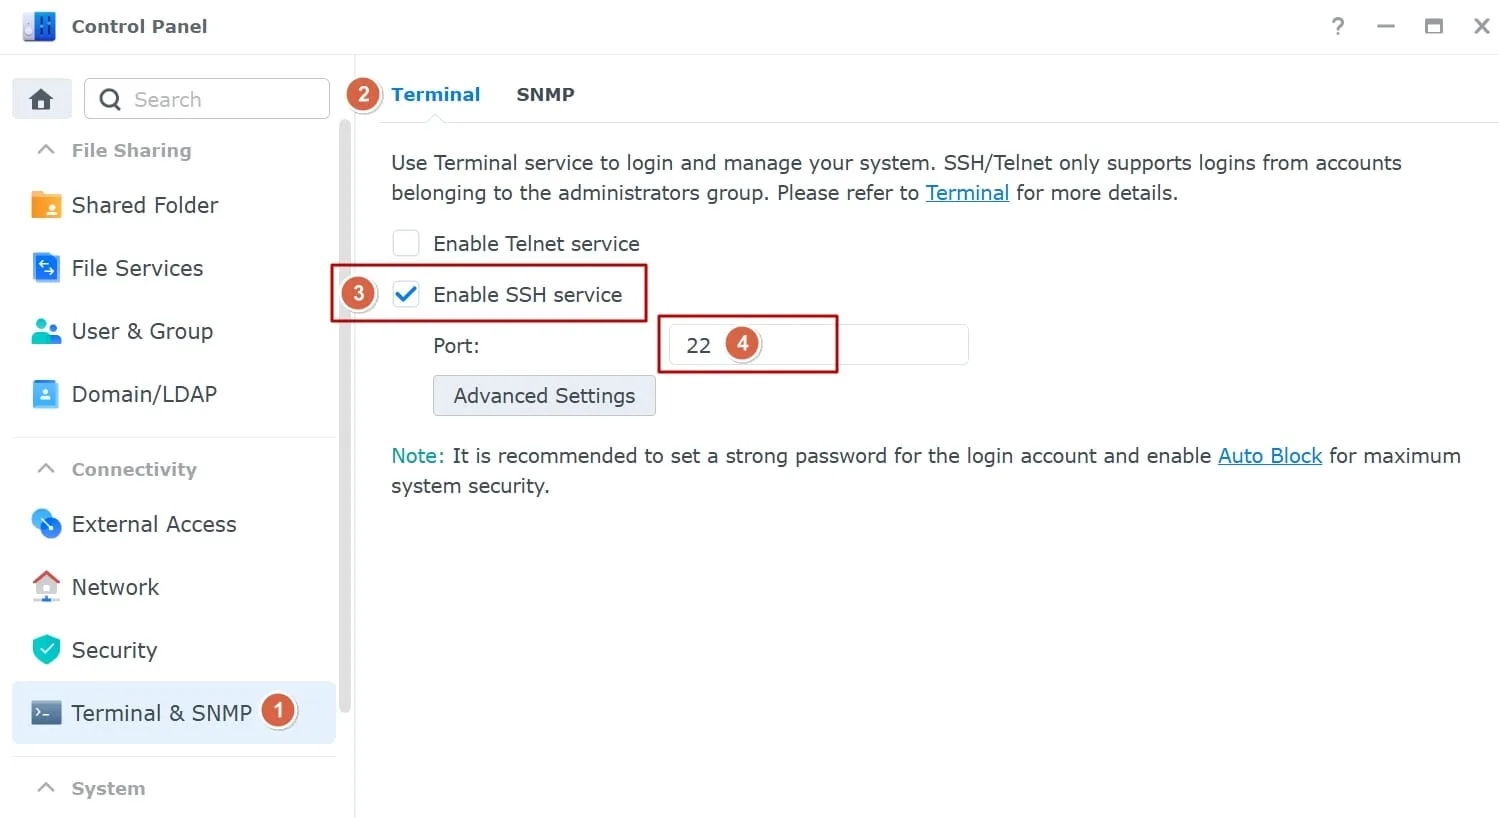
- Go to Control Panel → Terminal & SNMP → Terminal
- Enable SSH service
- Make sure port 22 (or your custom SSH port) is allowed in the NAS firewall
Step 3: Prepare the .ssh Directory on Synology NAS
From your Ubuntu machine, connect to the NAS using password authentication first:
ssh -p 22 jason@abc.i234.meAfter logging in, switch to root temporarily:
sudo -iThen create and configure the .ssh directory:
mkdir -p /var/services/homes/jason/.ssh
touch /var/services/homes/jason/.ssh/authorized_keys
chmod 700 /var/services/homes/jason/.ssh
chmod 600 /var/services/homes/jason/.ssh/authorized_keys
chown -R jason:users /var/services/homes/jason/.ssh
⚠️ Note) Synology recommends minimizing root usage. Use root only for setup, then exit once finished.
Step 4: Generate an SSH Key on Ubuntu
On your Ubuntu local machine, generate an SSH key:
ssh-keygenPress Enter to accept the default location:
~/.ssh/id_rsaOptionally, set a passphrase for extra security.
Generated files:
- Private key:
~/.ssh/id_rsa - Public key:
~/.ssh/id_rsa.pub
💡 Tip) For newer systems, you may also use:
Step 5: Copy the Public Key to Synology NAS
Use ssh-copy-id from Ubuntu:
ssh-copy-id -i ~/.ssh/id_rsa.pub -p 22 jason@abc.i234.meYou will be prompted for your NAS password once.
The public key will be appended to authorized_keys automatically.
Step 6: Verify OpenSSH Server Configuration (Optional)
In most DSM 7.1 installations, key authentication is already enabled.
If login without password does not work, check the SSH configuration:
sudo vi /etc/ssh/sshd_configEnsure the following lines are present and uncommented:
PubkeyAuthentication yes
AuthorizedKeysFile .ssh/authorized_keys
Step 7: Restart SSH Service on Synology NAS
Apply the configuration changes:
sudo synoservicectl --restart sshdStep 8: Test Passwordless SSH Login
From your Ubuntu machine:
ssh -p 22 jason@abc.i234.meIf everything is set up correctly, you should be logged in without being asked for a password.
Step 9: (Optional) Disable Password Authentication for Stronger Security
Once SSH key-based login is confirmed to work correctly, you can further harden
your NAS by disabling password-based SSH authentication.
This prevents brute-force attacks and ensures that only users with a valid SSH
key can access the system.
⚠️ Important
Do NOT apply this setting until you have successfully logged in using an SSH key. Otherwise, you may lose SSH access to your NAS.
Edit the SSH server configuration file:
sudo vi /etc/ssh/sshd_config

Find the following line and chagne it to:
#PasswordAuthentication yes -> PasswordAuthentication no
Restart the SSH service to apply the change:
sudo synoservicectl --restart sshdAfter this change, SSH key login will continue to work Password-based SSH login will be completely disabled.
Final Notes
- SSH key-based authentication is strongly recommended for:
- Automation and scripts
- Remote server management
- Improved security over password-based login
- Always protect your private key and restrict file permissions.
- Consider disabling password login entirely once key authentication is verified.
- After verifying SSH key access, consider disabling password authentication
to further secure your NAS.

![[Synology] How to Enable SSH and Log in as Root](/images/covers/synology_nas_ds916--thumb.webp)